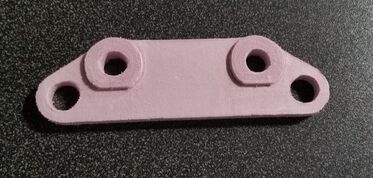
Making a Brake Bracket
|
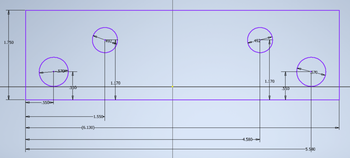
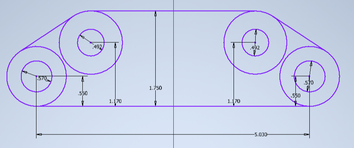
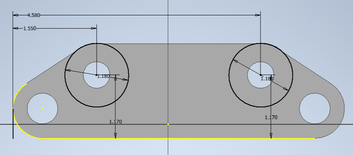
The first step to creating the brake bracket is to make a dimensioned rectangle according to the plans, and add the circles for the holes. Use the dimensions on the plan to get the holes in the correct spot. Then add larger circles centered around the holes to use for the rounded edges, make sure that the edge of the circle just meets each side of the rectangle.
|
|
|
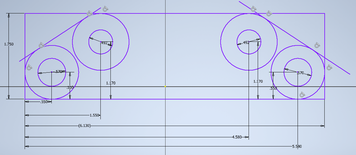
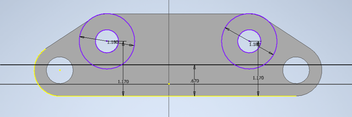
Then use the tangent and the trim tools to get rid of the extra lines, I had to remove some of the dimensions to keep the right shape as I removed lines. Next, extrude.
|
|
|
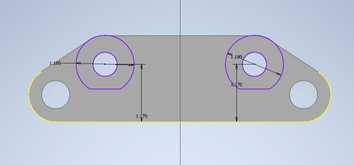
Create a new sketch on the front of the bracket, add the circles with the proper dimension, then use dimensions to place them correctly. I added a small vertical line on the left to dimension with and deleted it after. Create a horizontal line that crosses both circles. Adjust it to the correct height from the base, and use tangent and trim to remove the excess lines and the bottom of the circle.
|
|
|
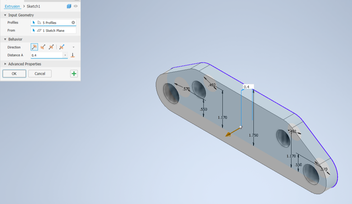
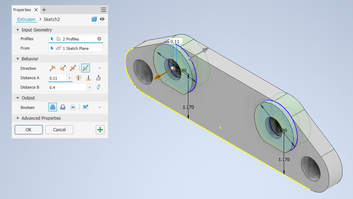
Add another circle over the holes from the first sketch, then extrude it both ways so it reaches the back of the object and extends past the front.
|
|
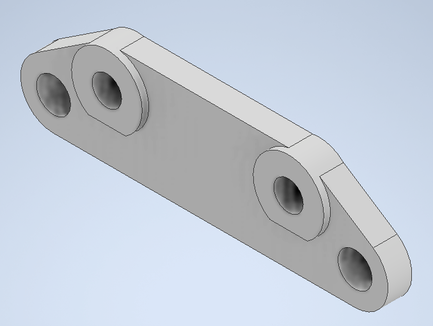
Final bracket in Inventor
|
We had a demonstration for how to use Fusion, but we didn't use it ourselves.

|
|
|
Overview
Right away at first, I had a difficult time when I was trimming the extra lines on the first sketch, I took some time for me to realize I could just delete the dimensions I had put in so the lines wouldn't keep moving as I deleted them. Once I figured that out, the rest of it went very quickly. I did end up making it twice (which I have done with all of my inventor creations) to get the screenshots, but that was by choice. I liked that I was able to use circles for the edges, it was a new challenge and I feel like I know more about what Inventor can do.
