What is Inventor?Inventor is an application that allows a creator to design parts, assemble parts, draw a blueprint, or create a presentation. To make our widgets, we only used the parts section of Inventor. You start by creating a 2 dimensional sketch and then extruding it to make it 3 dimensional, from there you can add or remove more pieces to the part.
|
|
|
|

|
|
|
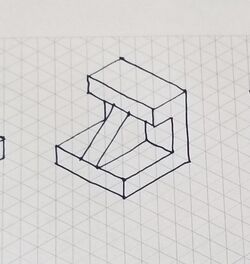
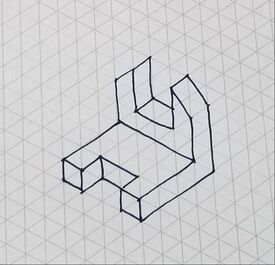
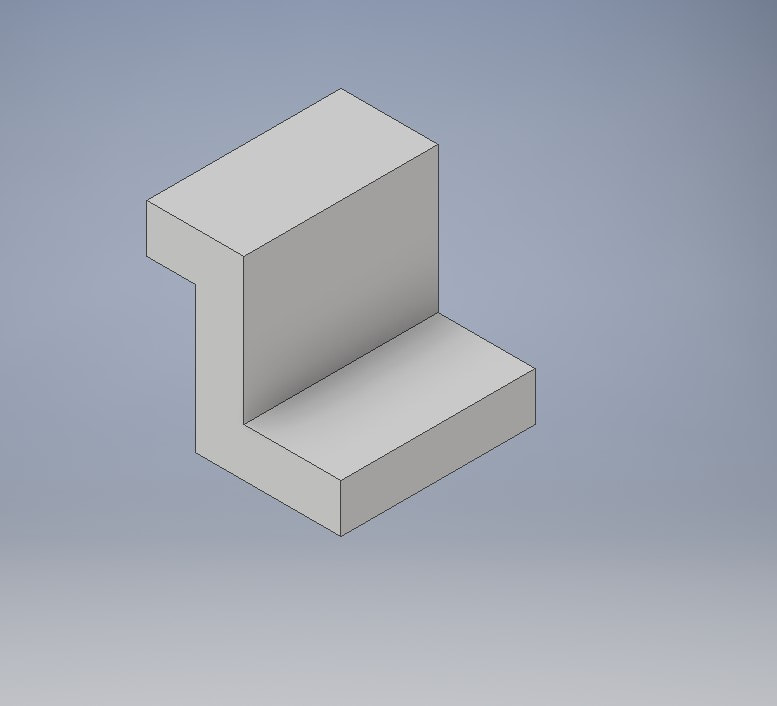
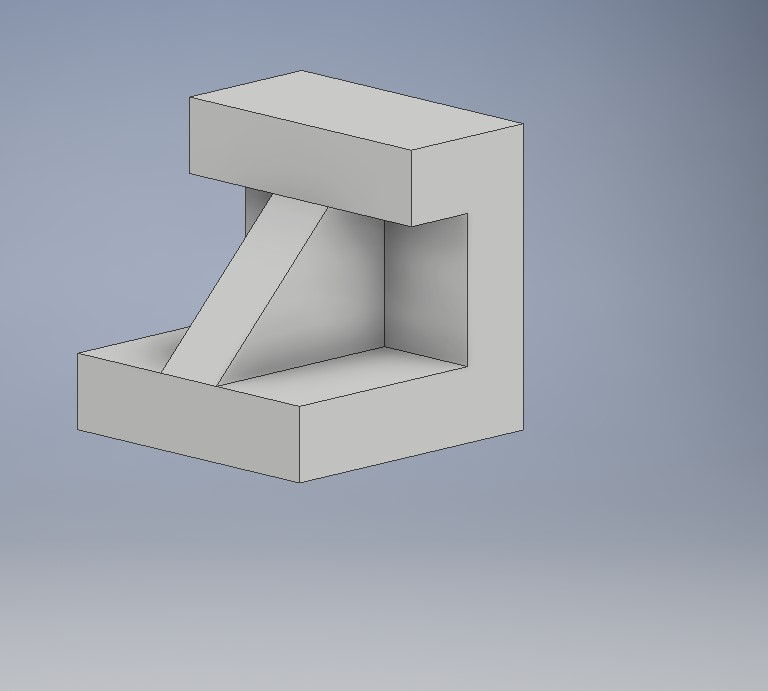
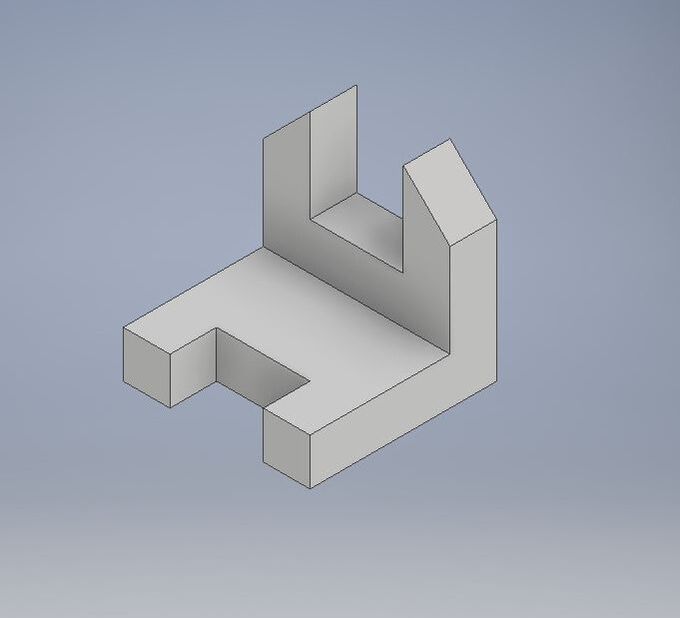
These are my finished widgets #1-5 in Inventor
Making Widget #6
Before you start creating the widget, you have to open Inventor, and then open up a new part. From there go to the sketch tab on the top and select Line. Then 3 workplanes will show up on the workspace and select the horizontal plane labeled XZ Plane.
|
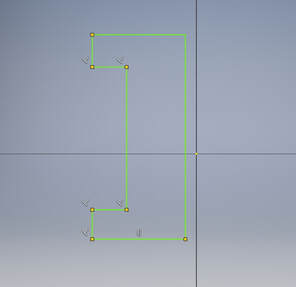
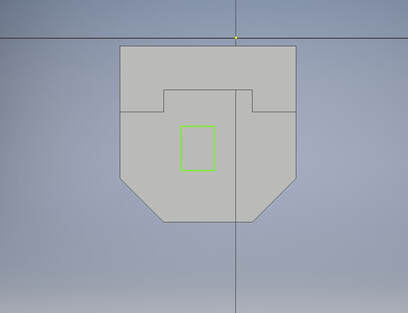
Step 1:
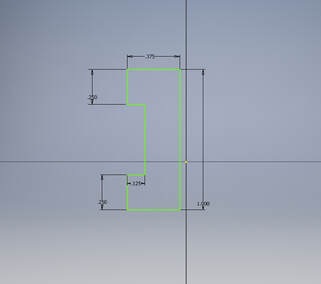
Use the line tool to draw a rough sketch of the top of the widget. Make sure all angles are 90 degrees and all the corners are connected. Step 2:
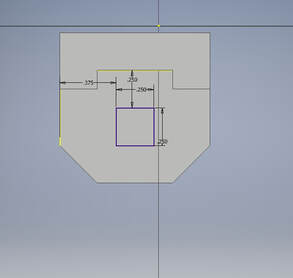
Select the dimension tool and use it to add the correct dimensions to the sketch by selecting the corners on each line. Scale 1 unit: 1/4 inch |
|
|
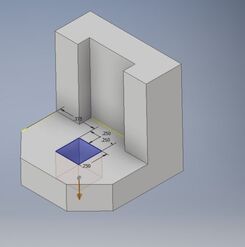
Step 3:
Click the Finish Sketch button in the tool bar, then switch over to the 3D model tab and click extrude. Make sure the distance of the extrusion is 0.75 inches. 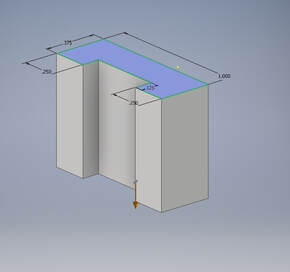
|
Step 4:
Use the view cube to view the bottom, then click on the bottom face of the shape and create a sketch. Draw a rough sketch of the base of the widget. 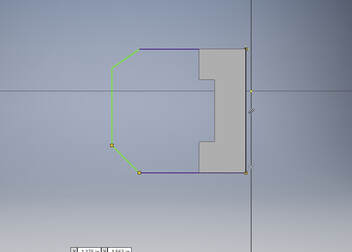
|
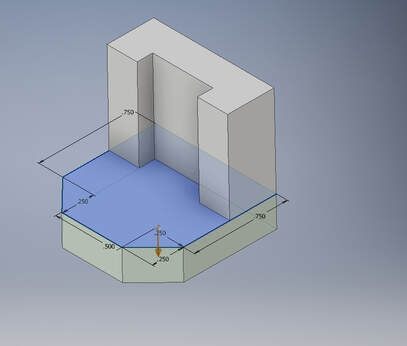
Step 5:
Use the dimension tool to add the proper dimensions to the sketch of the base. 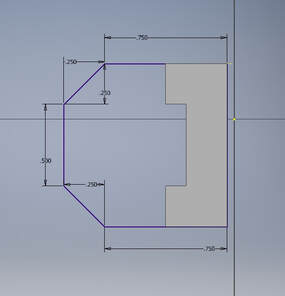
|
|
Step 6:
Finish the sketch and then extrude it so that it is 0.25 inches. Step 7:
Select the top of the base and make a new sketch. Draw a rectangle in the center. |
|
|
Step 8:
Use the dimension tool to make it a 0.25" by 0.25" square and center in the center of the base. |
|
|
Step 9:
Finish the sketch and extrude the square 0.25 inches to make a hole. |
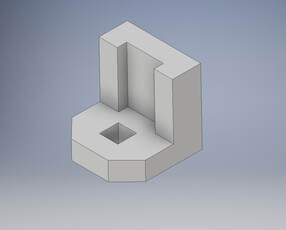
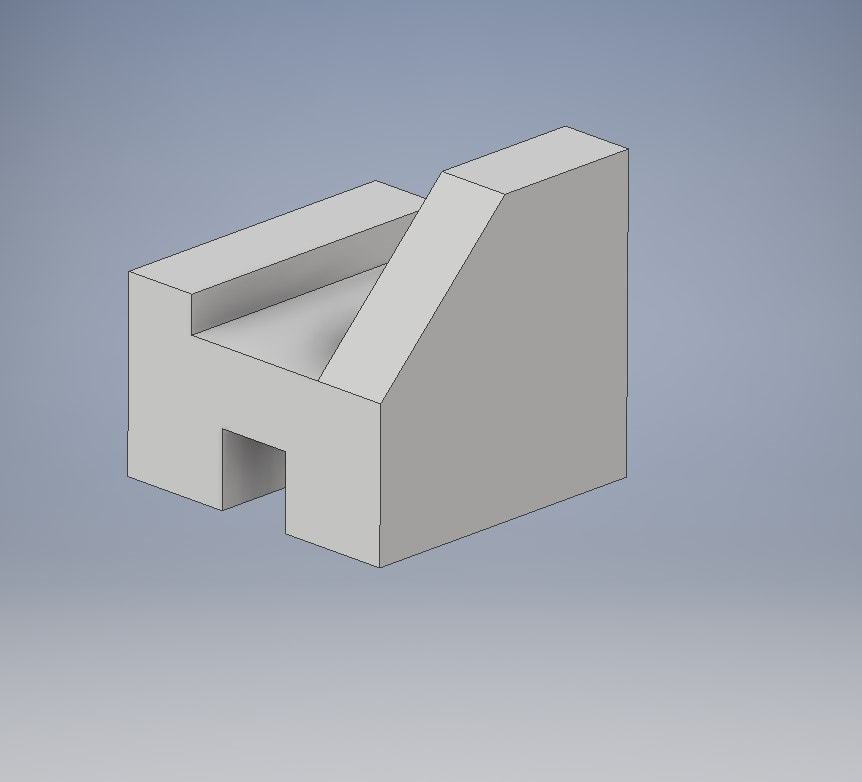
Finished widget #6
Makerbot Desktop
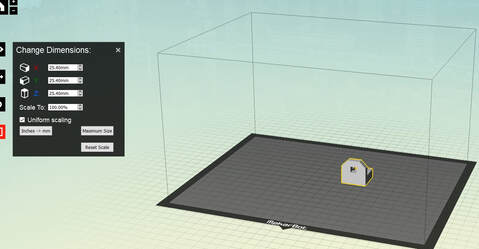
Setting up in Makerbot.
|
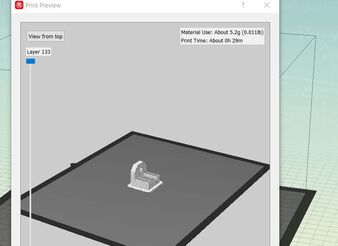
Print preview from Makerbot.
|
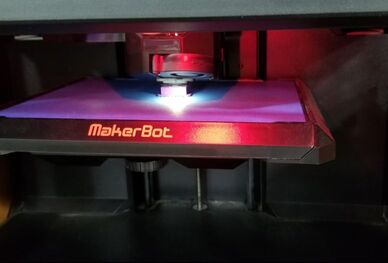
1/2 way-ish through printing.
|
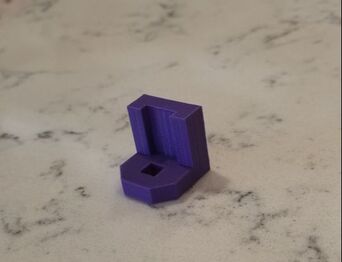
Final product!
|
Overview
While working on this project, I learned how to navigate Autodesk Inventor, and how to make a file that can be used by the 3D printer using Makerbot. While working in Inventor, I learned that you have to be fairly precise when you are creating 2D shapes. You have to make sure that the angle of each line is exactly correct, which is difficult when it isn't 90 degrees, you also have to make sure all of the corners meet, or it won't extrude (I did that a few times).
